

初见enum(中文称之为枚举)这个数据类型,几乎所有人都认为这是最废物的东西。感觉上除了限制一个数值不会输入错误外,并没有感觉到它比别的数据类型有什么好(更别提优秀)的地方了。恰恰相反,经过很多次的使用,现在每次看到一个View中的物件,我第一个就想到要使用一个enum来定义它。昨天我和小朋友们来写一个Wordle的模仿者时就决定今天要写个小纸条记录一下。
enum基础
官方对于enum的说明在这里。简而言之一个enum就是一组有共同特性一的数据的集合。我看来看看这就是一个Wordle的界面:
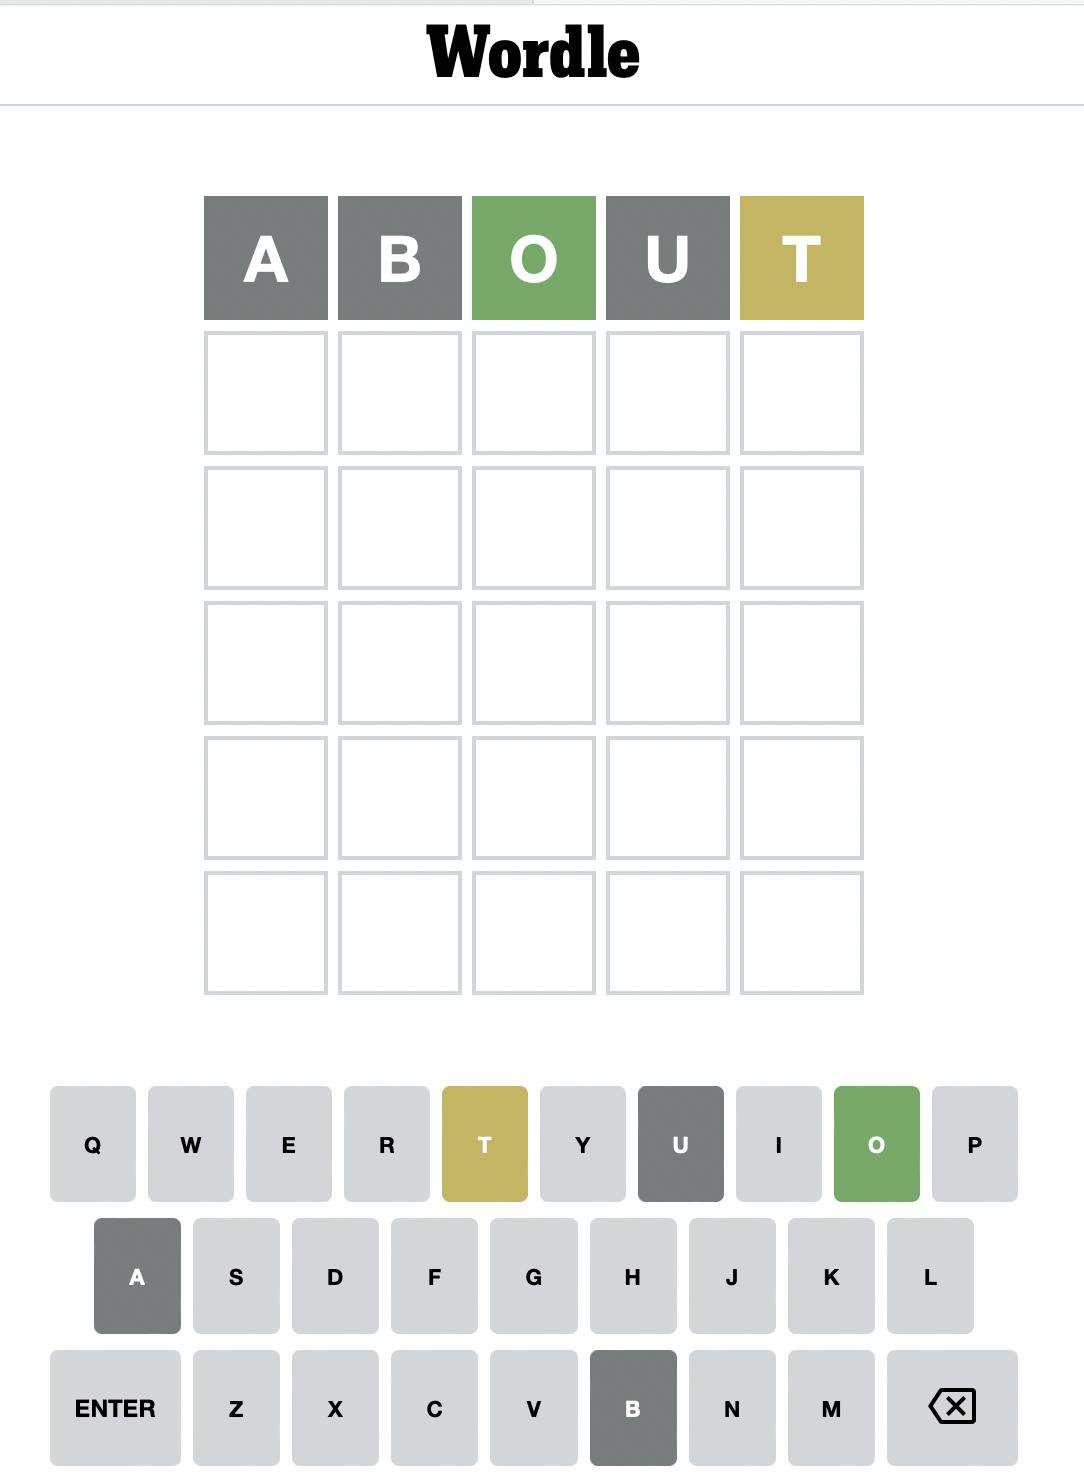
我们来解决下面的键盘,按键上的键有两种:字母和功能键。每个按键还有四种不同的状态,没使用过的淡灰色、没用的深灰色、位置对的绿色和位置不对的黄色。所以我们就有了这两个枚举定义:
enum KeyboardButton{
    case letter
    case function
}

enum Status{
    case notused
    case gray
    case green
    case yellow
}
这样就定义了最基础的两个enum,但是,这样的定义看起来不是非常有意义,比起String没有什么特别的不同。
为enum加入数据
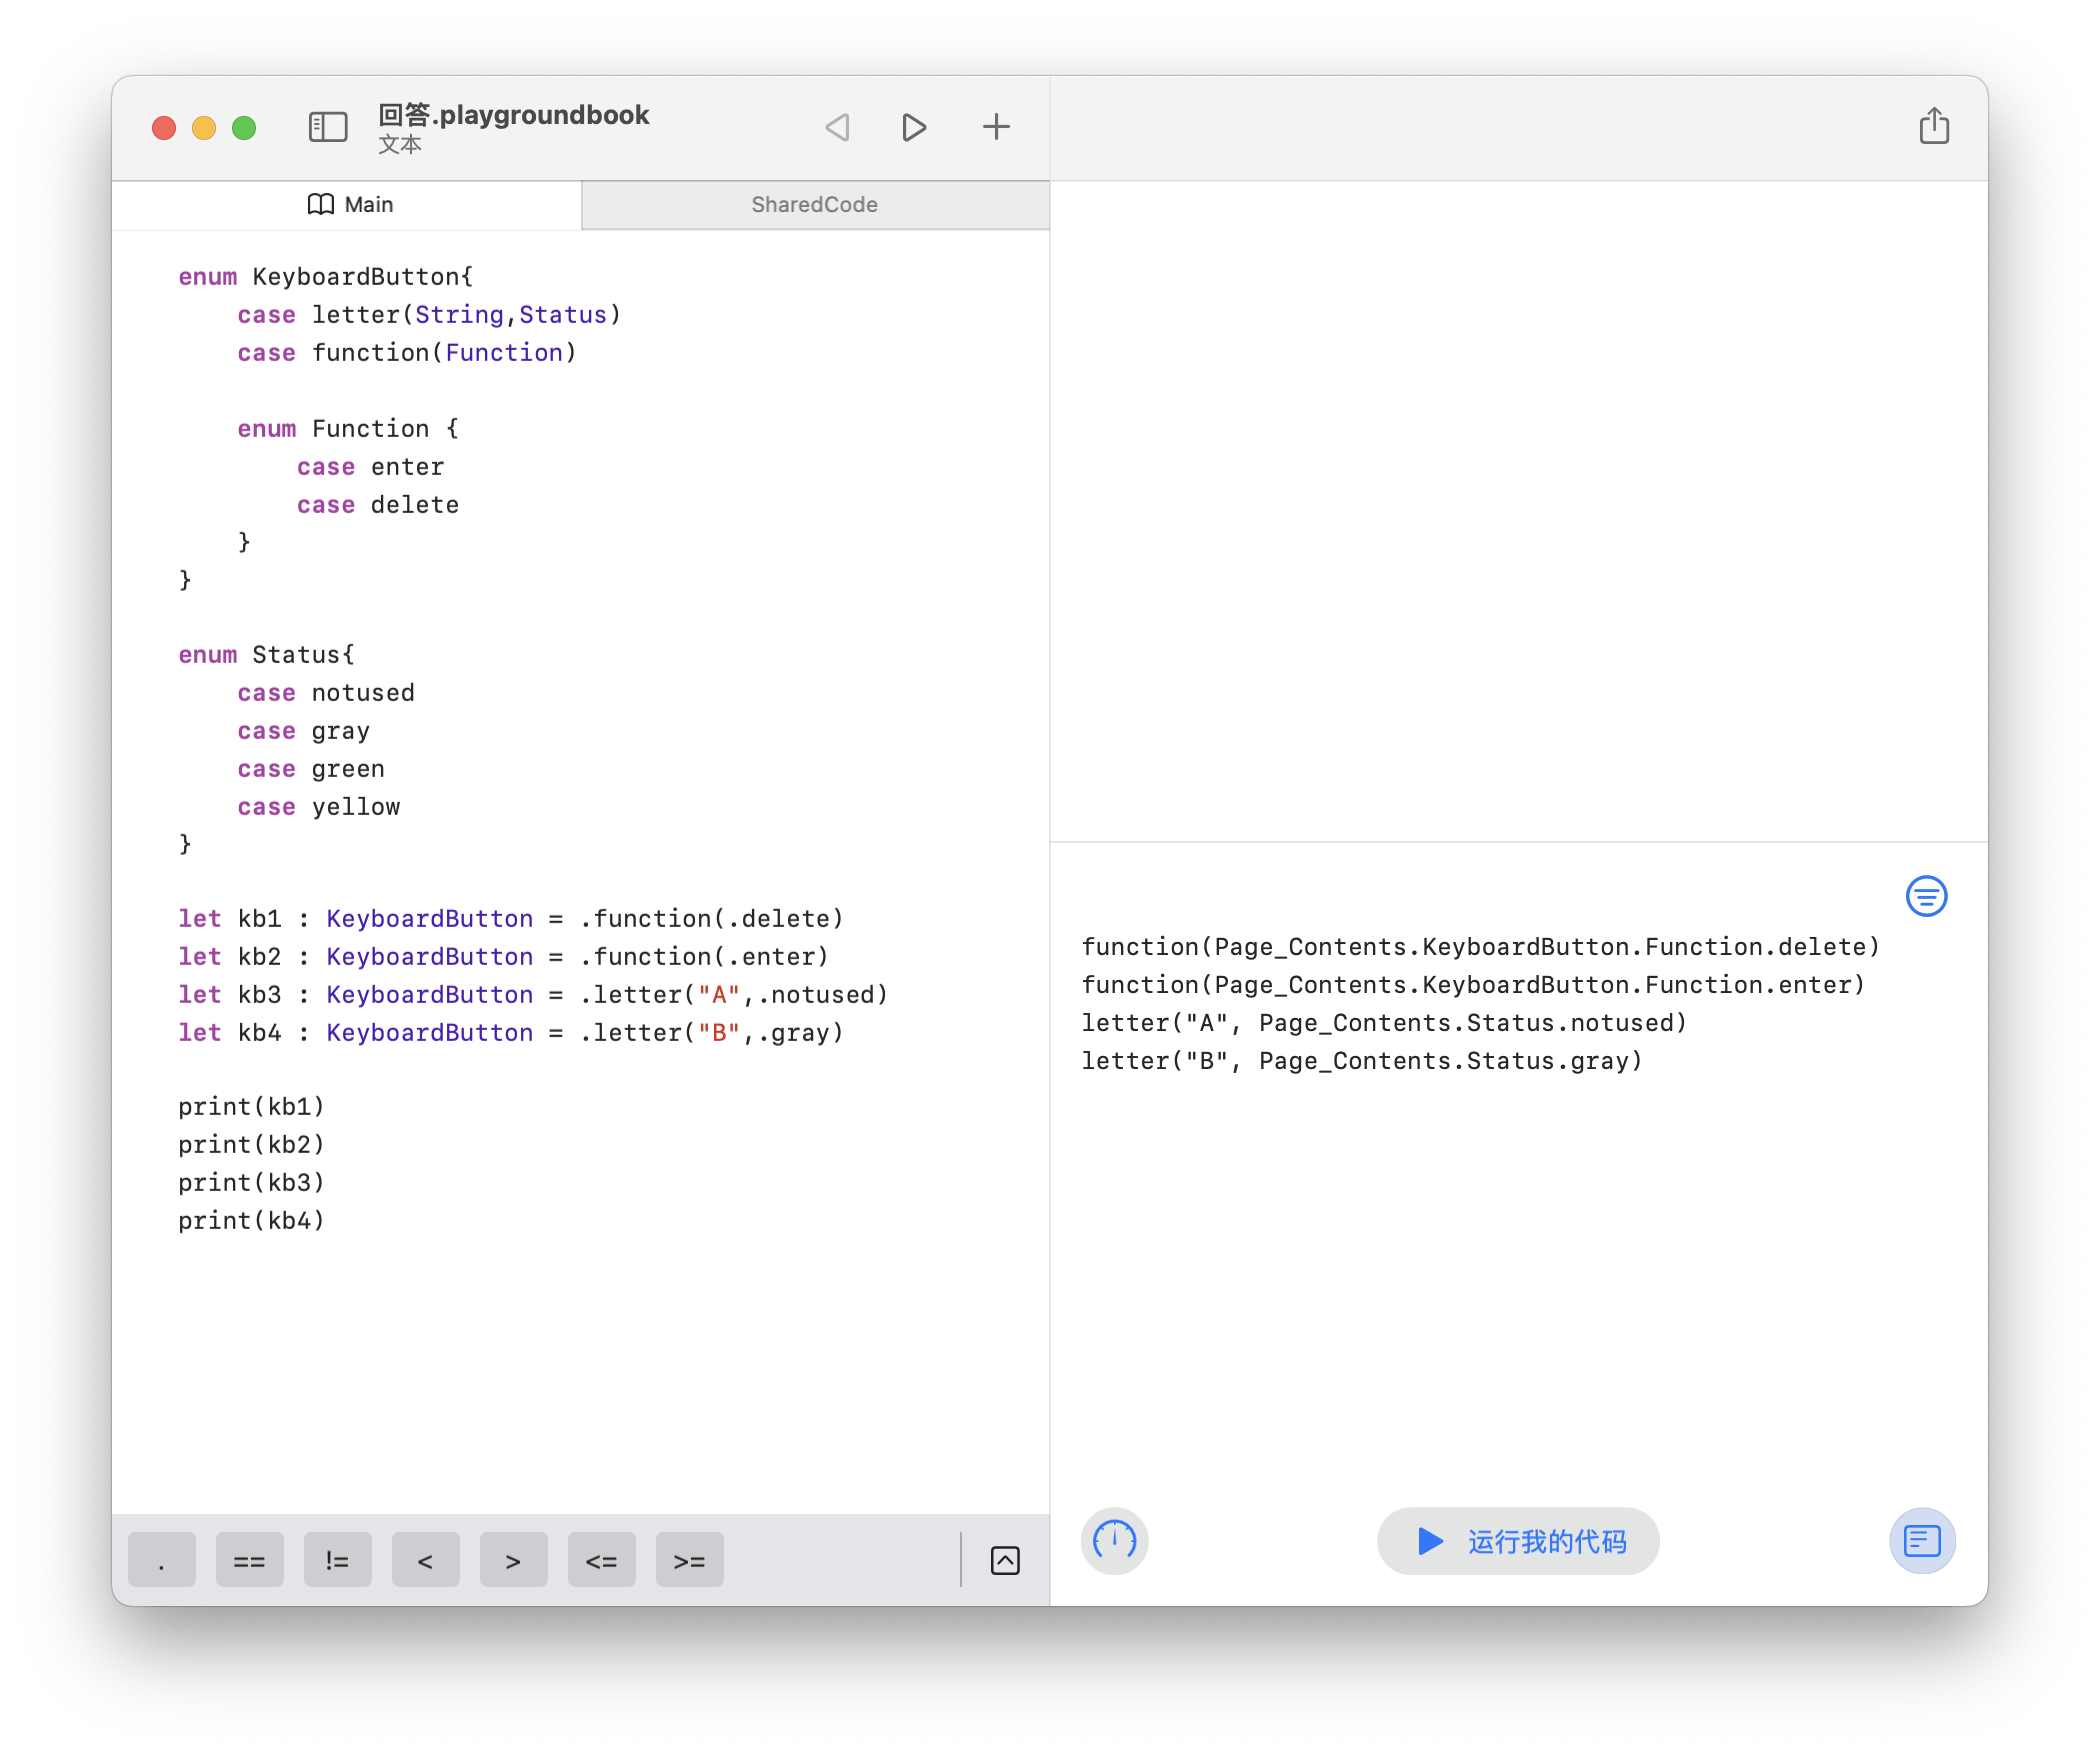
我们知道所有的letter都是一个字母,enum提供了一个叫做Associated Values(关联值的方法)让你可以在一个enum中存入数据。我们可以改造一下KeyboardButton,letter可以存入一个String,如果我们仔细观赛,会发现只有字母有颜色不同的状态,所以我们也应该把Status做为letter的关联值。另外,function按钮只有两个,一个是enter,另一个是delete,所以我们可以给它再关联一个enum,它就成了这样:
enum KeyboardButton{
    case letter(String,Status)
    case function(Function)

    enum Function {
        case enter
        case delete
    }
}

enum Status{
    case notused
    case gray
    case green
    case yellow
}
定义一个enum的实例其实变的非常简单了:
let kb1 : KeyboardButton = .function(.delete)
let kb2 : KeyboardButton = .function(.enter)
let kb3 : KeyboardButton = .letter("A",.notused)
let kb4 : KeyboardButton = .letter("B",.gray)
我们来看看使用它后的效果:
为enum加入属性
为Keyboard初始化后,怎么取出设置进去的关联值呢?其实我们可以非常简单的通过为enum增加属性来达到这个目的。比如我们想得知这个按键在显示时的titele(String)和显示的背景与字体本身的颜色,哪就定义出三个不同的计算属性:title、foregroundColor、backgroundColor。先来看下title属性的定义:
extension KeyboardButton{
    var title: String{
        switch self {
        case .letter(let letter, _):
            return letter
        case .function(let function):
            switch function {
            case .delete:
                return "Delete"
            case .enter:
                return "Enter"
            }
        }
    }
}

let kb1 : KeyboardButton = .function(.delete)
let kb2 : KeyboardButton = .function(.enter)
let kb3 : KeyboardButton = .letter("A",.notused)
let kb4 : KeyboardButton = .letter("B",.gray)

print(kb1.title)
print(kb2.title)
print(kb3.title)
print(kb4.title)
这时print出来的就是我们需要的String了。
Delete
Enter
A
B
理解了title计算属性的定义,另外两个计算属性就简单了:
var backgroundColor:Color{
    switch self {
    case .letter(_, let status):
        switch status {
        case .notused:
            return .white
        case .gray:
            return .gray
        case .green:
            return .green
        case .yellow:
            return .yellow
        }
    case .function(_):
        return .white
    }
}

var foregroundColor:Color{
    switch self{
    case .function(_):
        return .black
    case .letter(_, let status):
        switch status{
        case .notused:
            return .black
        default:
            return .white
        }
    }
}
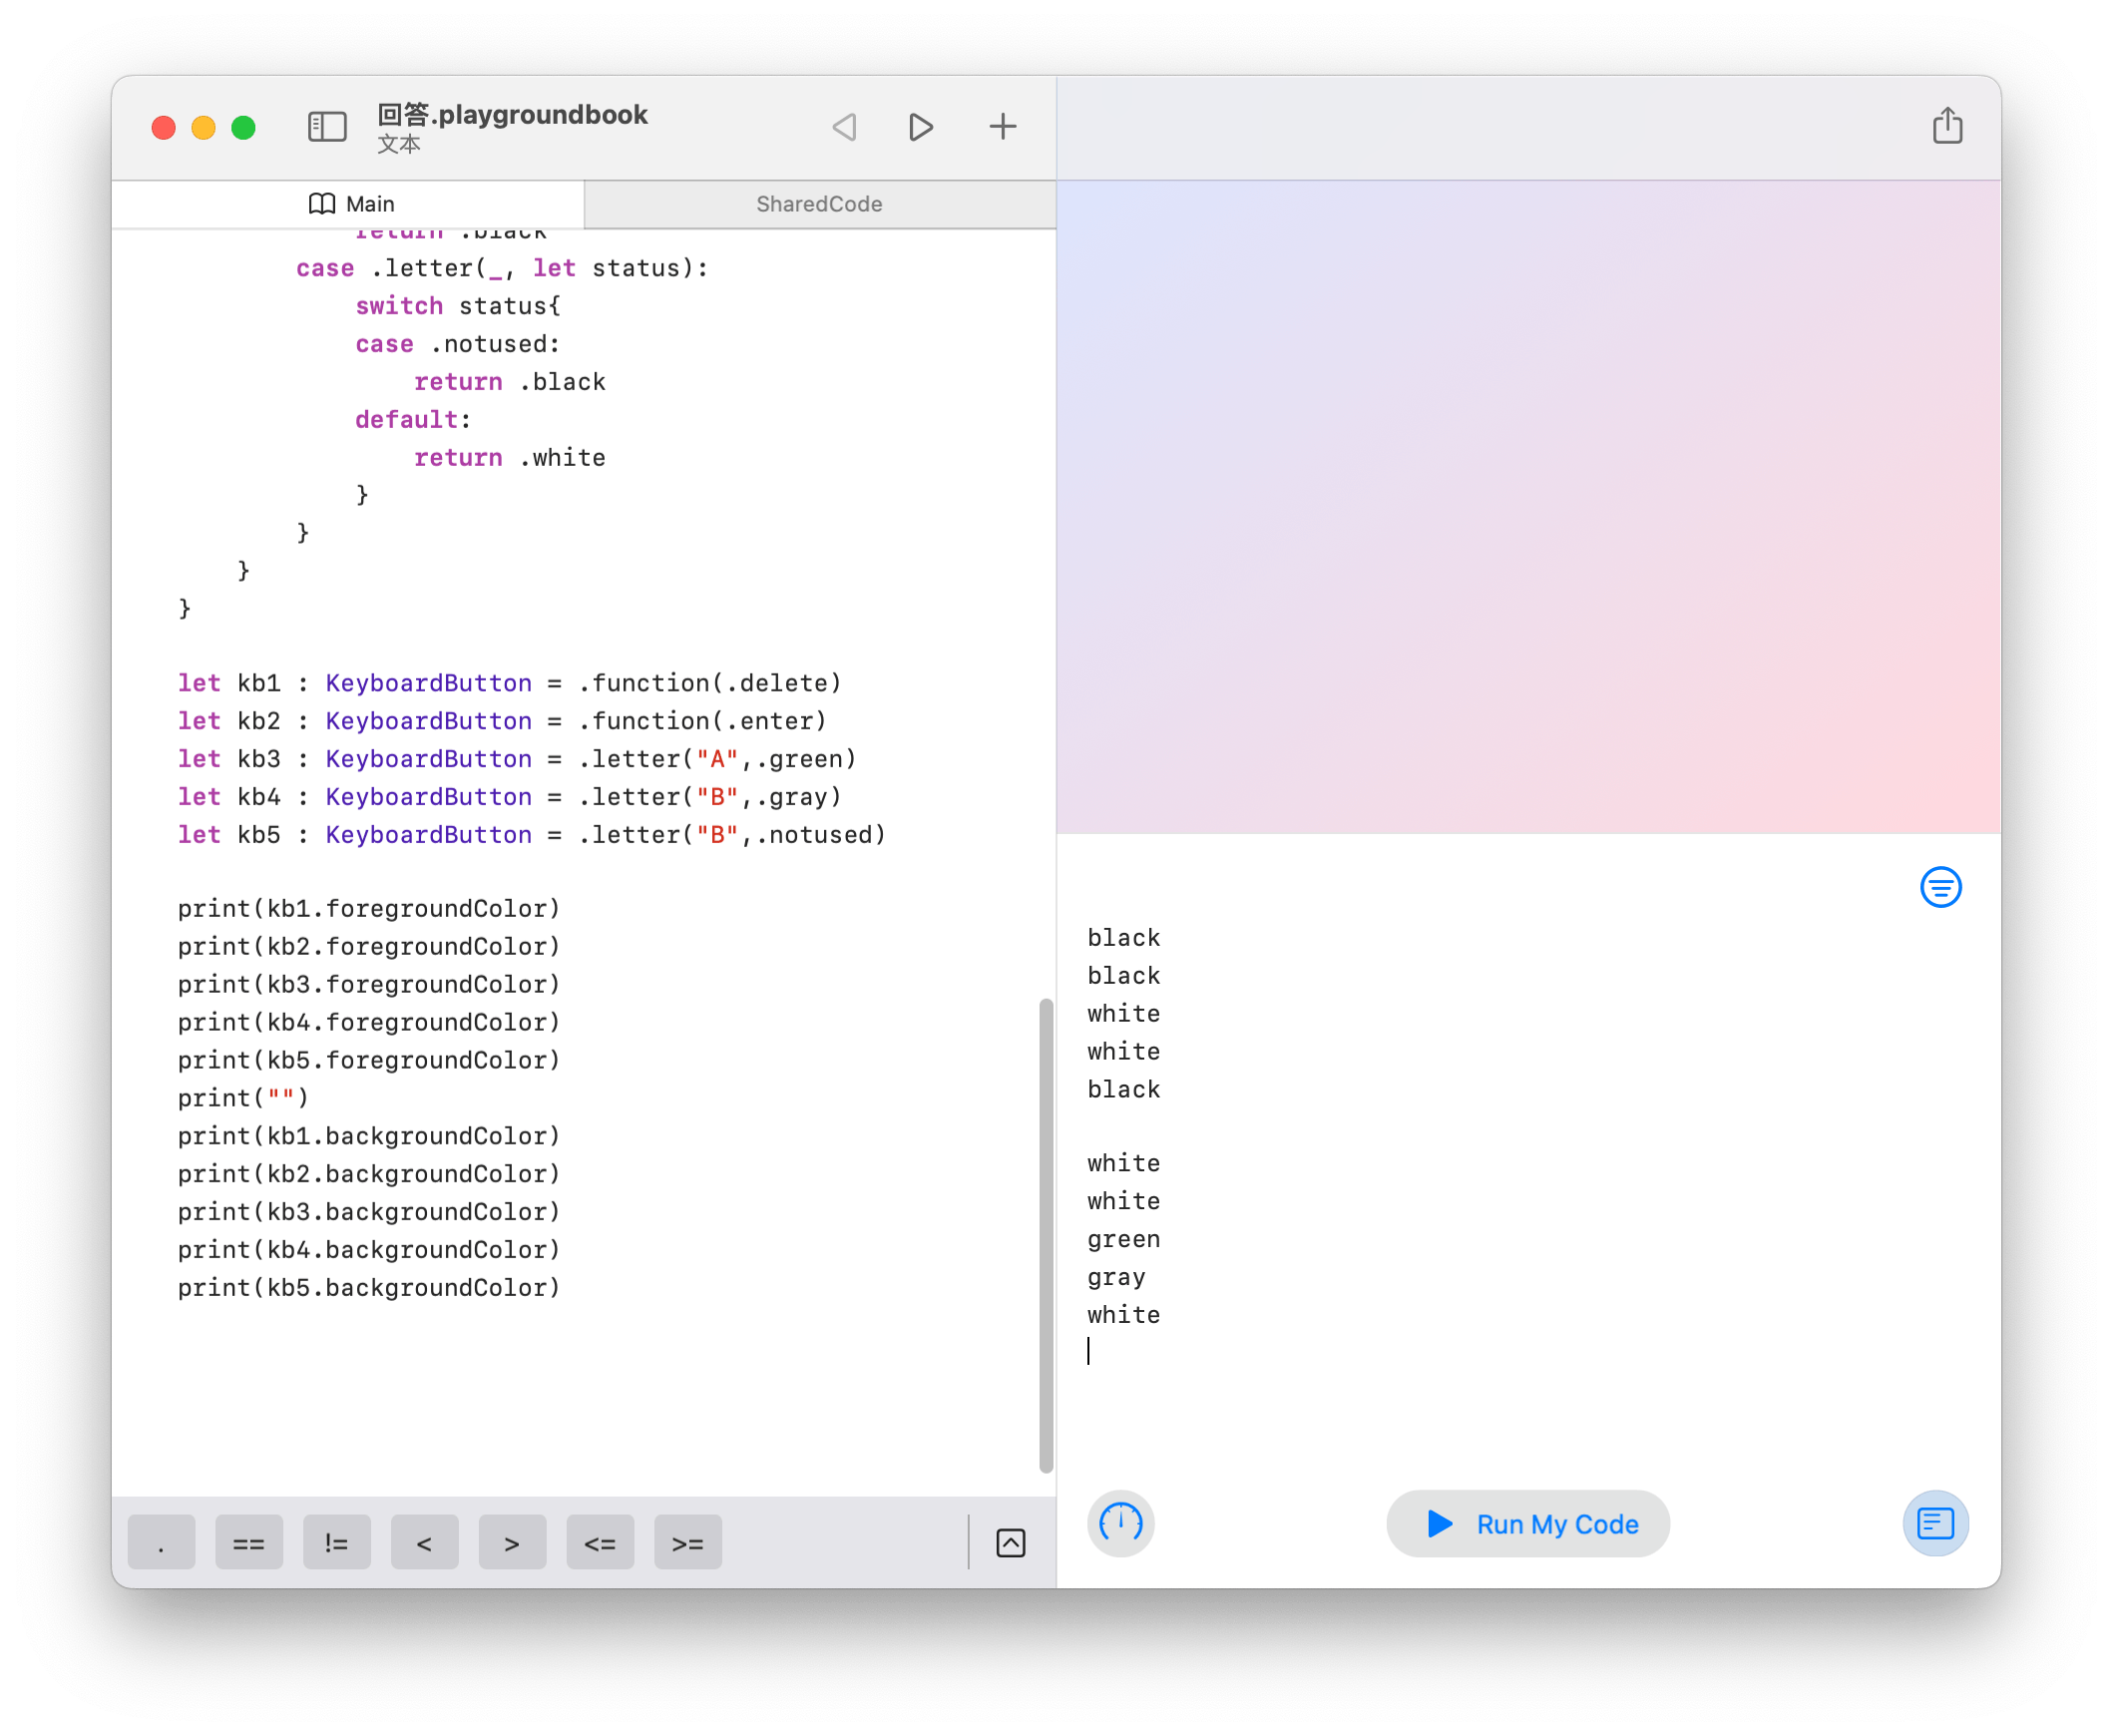
我们试试这样之后的效果:
将enum运用到SwiftUI中
KeyboardButton的enum声明
为了将这组enum运用到SwiftUI里,我做了一点简化的修改,整体如下:
import SwiftUI

enum KeyboardButton:Hashable{
    case letter(String,Status)
    case function(Function)

    enum Function {
        case enter
        case delete
    }
}

enum Status{
    case notused
    case gray
    case green
    case yellow
}

extension KeyboardButton{
    var title: String{
        switch self {
        case .letter(let letter, _):
            return letter
        case .function(let function):
            switch function {
            case .delete:
                return "Delete"
            case .enter:
                return "Enter"
            }
        }
    }

    var backgroundColor:Color{
        switch self {
        case .letter(_, let status):
            switch status {
            case .notused:
                return .red
            case .gray:
                return .gray
            case .green:
                return .green
            case .yellow:
                return .yellow
            }
        case .function(_):
            return .red
        }
    }

    var foregroundColor:Color{
        switch self{
        case .function(_):
            return .black
        case .letter(_, let status):
            switch status{
            case .notused:
                return .black
            default:
                return .white
            }
        }
    }
}
准备一个ViewModel
这个ViewModel里只有键盘部局就好
struct ViewModel{
    var keyboard :[[KeyboardButton]] = [
        [
            .letter("Q", .notused),
            .letter("W", .notused),
            .letter("E", .gray),
            .letter("R", .gray),
            .letter("T", .yellow),
            .letter("Y", .notused),
            .letter("U", .notused),
            .letter("I", .notused),
            .letter("O", .notused),
            .letter("P", .notused)
        ],
        [
            .letter("A", .notused),
            .letter("S", .notused),
            .letter("D", .gray),
            .letter("F", .gray),
            .letter("G", .yellow),
            .letter("H", .notused),
            .letter("J", .notused),
            .letter("K", .notused),
            .letter("L", .notused)
        ],
        [
            .function(.enter),
            .letter("Z", .notused),
            .letter("X", .notused),
            .letter("C", .notused),
            .letter("V", .notused),
            .letter("B", .notused),
            .letter("N", .notused),
            .letter("M", .notused),
            .function(.delete)
        ]
    ]
}
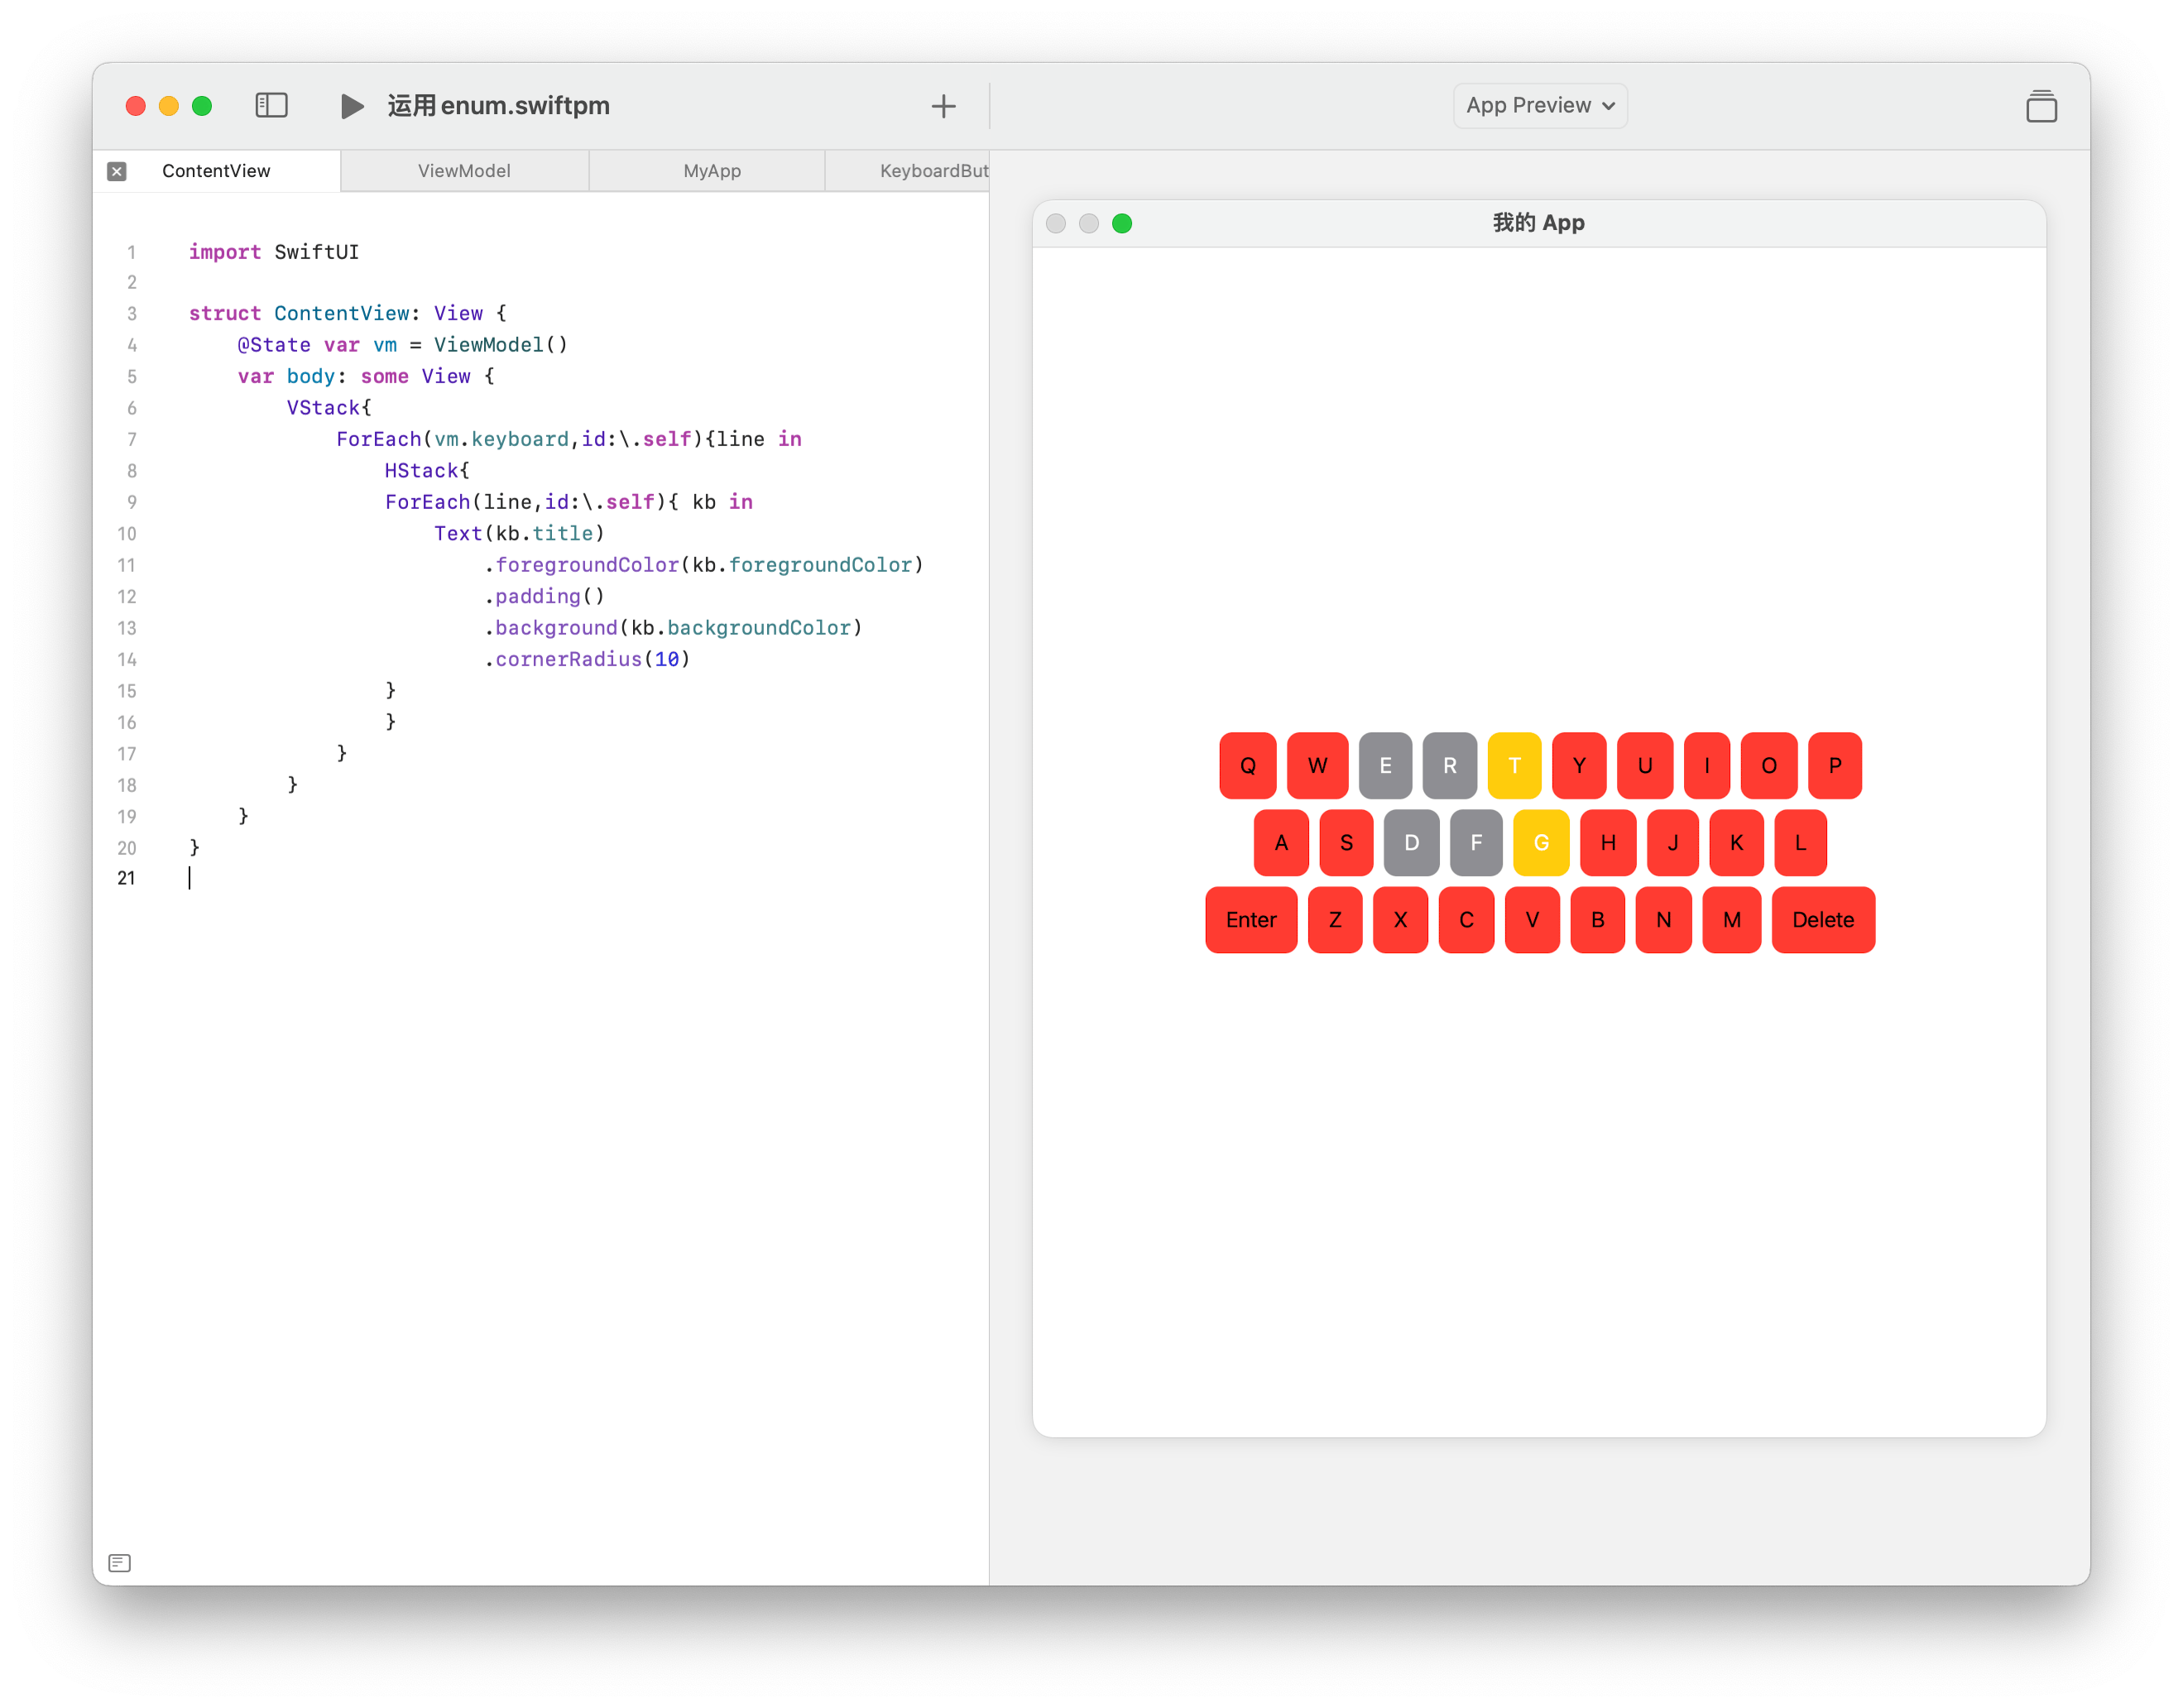
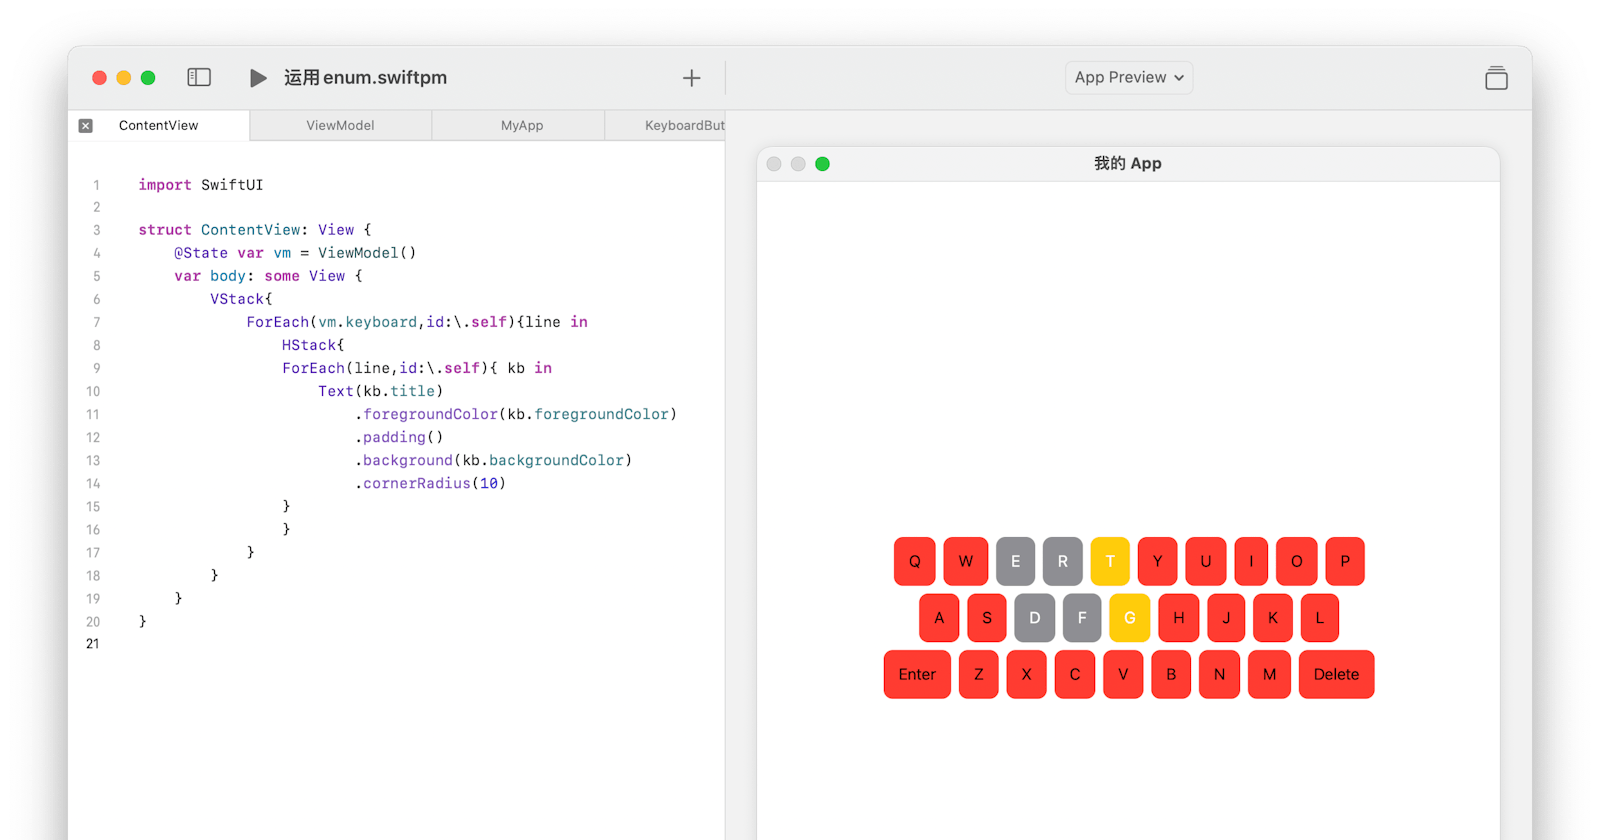
完成SwiftUI View
import SwiftUI

struct ContentView: View {
    @State var vm = ViewModel()
    var body: some View {
        VStack{
            ForEach(vm.keyboard,id:\.self){line in
                HStack{
                ForEach(line,id:\.self){ kb in
                    Text(kb.title)
                        .foregroundColor(kb.foregroundColor)
                        .padding()
                        .background(kb.backgroundColor)
                        .cornerRadius(10)
                }
                }
            }
        }
    }
}
最后我们看看效果: